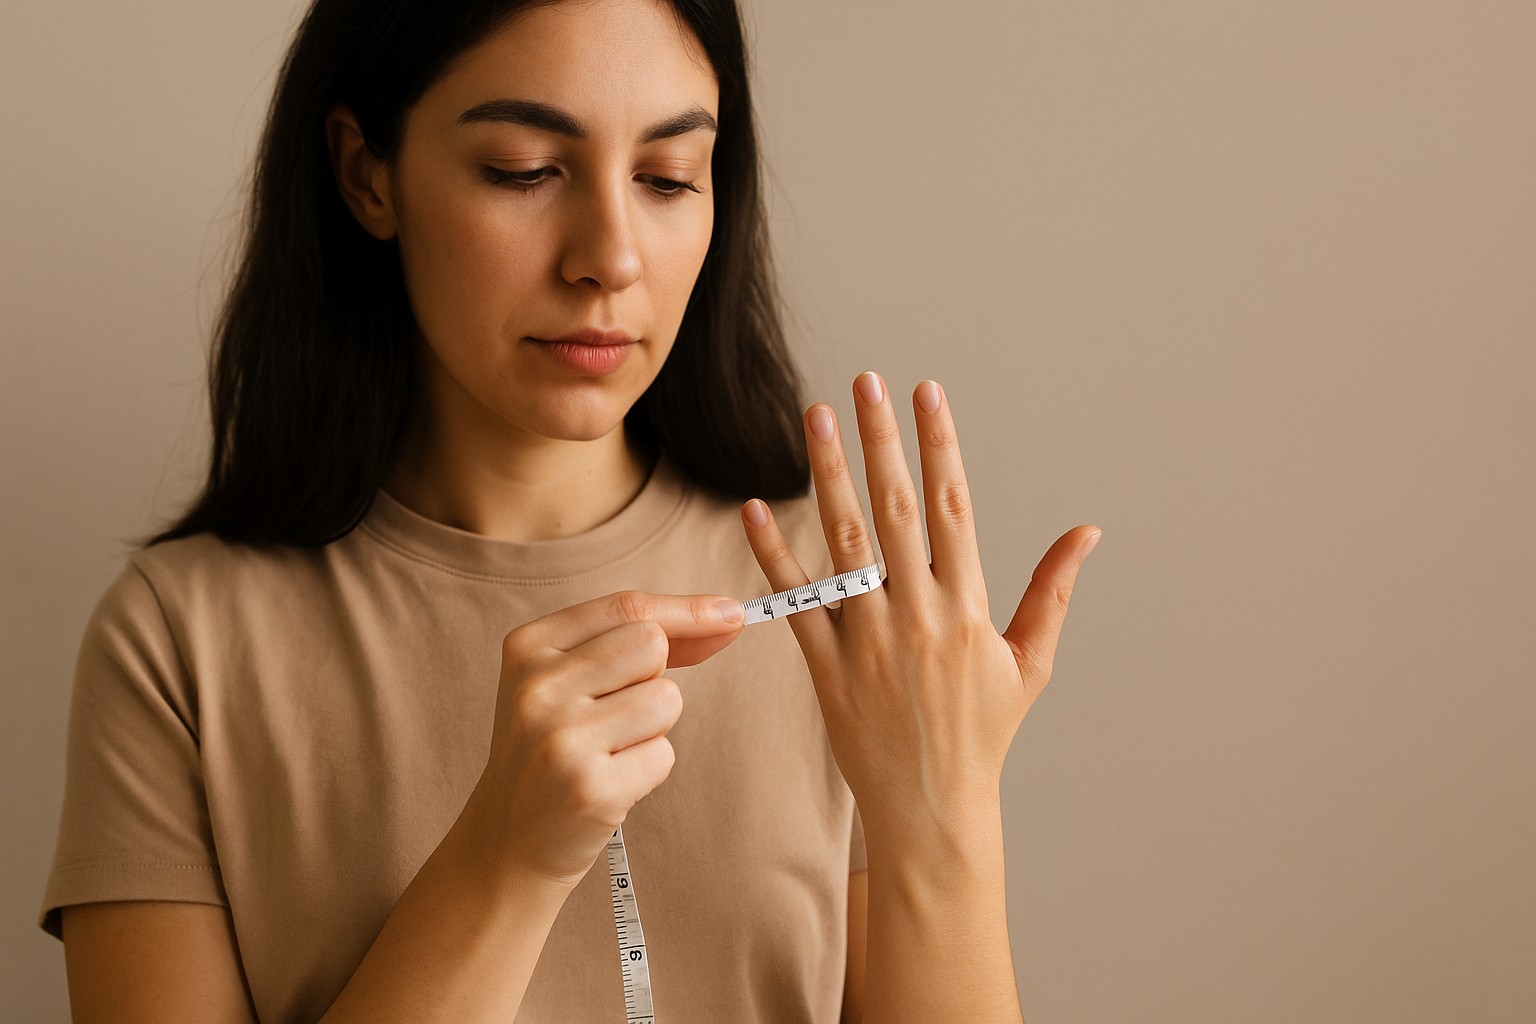
Just follow a few simple steps and you can determine your ring size reliably at home; in this guide you’ll learn how to use a printable sizer, a soft measuring tape, or calipers and how to test ring fit across knuckles. Use measurements taken at room temperature and when your fingers are at their normal daily size, use a reliable sizer or caliper for accuracy, and never force a ring over a knuckle or cut into your skin.
Demystifying the Science of Ring Sizes
Finger size is a simple geometric measure at heart: a ring’s fit depends on the ring’s inner circumference or inner diameter, and those two are linked by the formula C = π·D. You can use that relationship to convert measurements quickly — for example, an inner diameter of 17.3 mm corresponds to a circumference of about 54.3 mm, which will help you map to the standard size charts used by most retailers. Temperature, hydration and time of day all change those millimeters: typical finger fluctuations of 0.5–1.0 mm across the day are common, so take measurements when your hands are at normal body temperature and not swollen from heat or exercise.
Band profile and width also alter perceived fit. Narrow bands (under 4 mm) slide over the knuckle more easily, while wide bands (8–10 mm and up) can feel tighter even when the measured diameter is identical. A practical guideline many jewelers use: increase your measured size by roughly half a size for very wide bands, and always test-fit a sample band if possible before ordering a bold-profile ring.
The Anatomy of Ring Size: Circumference vs. Diameter
Circumference (the inner length around the ring) is the dimension most sellers use in millimeters, while diameter (the straight-line distance across the inside of the ring) is quicker to measure at home with calipers or against a ruler. Calculations are straightforward: multiply diameter by π (3.1416) to get circumference. For an immediate example, a ring with a 16.5 mm inner diameter has a circumference of about 51.8 mm, which commonly maps to a US size 6 on conversion charts.
When you measure an existing ring, place calipers inside the band and read the inner diameter to the nearest 0.1 mm, then convert to circumference if you need to match a chart. Avoid measuring the outer diameter or the ring’s face, since that will overstate the size. Always measure the inner diameter, not the outer diameter, and never force measuring tools into a ring where they can slip or rotate — that introduces error.
Navigating Different International Sizing Standards
Different markets express size in different units: the US/Canada system is numeric with each full size increment equal to roughly 0.4 mm in diameter (≈1.25 mm in circumference); European/ISO sizes are simply the inner circumference in millimeters (so EU 52 = 52 mm circumference); Japan and China commonly use numbers that correspond to inner diameter in millimeters (a “16” indicates ~16 mm diameter); the UK and Australia use an alphabetic scale (A–Z with half sizes). A quick concrete conversion: US size 6 ≈ 16.5 mm diameter ≈ 51.8 mm circumference ≈ EU 52.
Conversion charts make cross-border shopping workable, but take them as approximations rather than absolute truth. Tolerances in manufacturing, differences in band profiles, and the use of half- or quarter-sizes can shift the practical fit by a hair. If you discover a discrepancy—say the label says EU 52 but the ring measures 51.6 mm circumference—that 0.4 mm difference can be the gap between comfortable and snug.
When you order across borders, give sellers the exact millimeter measurement whenever possible: supply the ring’s inner circumference in mm or the inner diameter in mm rather than a letter or local number. Printable size guides work if your printer is set to 100% scale, and measuring an existing ring with calipers and sending that numeric value to the retailer removes most guesswork. If you fall between sizes and are choosing a wider band, opt for the larger size to reduce the chance of a painfully tight fit.
The Pitfalls of DIY Measurements
Many at-home methods look simple but hide small errors that add up. A strip of paper or a length of thread can compress, stretch or twist; that can introduce errors of a millimeter or two, which translates to roughly a third to half a ring size in many sizing charts. Household tape measures often read in inches or rounded millimeters, and that rounding can shift your result. If you substitute a random ring as your template, differences in band profile, inner beveling and wear will give you a false reading even if the outer diameter looks right.
Finger shape and knuckle size also defeat one-off measurements. Some people have slim finger bases and large knuckles, others the opposite; a ring that slides on over a knuckle can still spin or pinch once on your finger. Try to avoid relying on a single quick read — repeated measures, recorded in millimeters, tend to reveal the consistent number you actually need.
When Timing Can Sabotage Your Sizing
Heat, humidity and activity change finger circumference more than you might expect. After a 30-minute workout or a long flight your fingers can swell enough to require up to one full size larger ring than what fits you in the morning. Cold temperatures can shrink fingers, making a ring you measure in the morning feel painfully tight by evening if you buy to that smaller size.
Measure at a baseline: a normal room temperature (about 20–22°C or 68–72°F) and mid-day, after you’ve been up and moving for a bit, gives the most reliable fit. You can also measure several times across a day — if results vary by more than a half size, choose the larger size or plan for an adjustable or resizable setting.
The Fine Line: Tight vs. Loose Measurement Techniques
Tight measurements often come from wrapping string or paper snugly and cutting it without accounting for compression; that leads to rings that feel like they’re cutting circulation after an hour. Loose measurements come from letting the measuring strip sit loosely on the finger or using a ring that barely contacts the finger’s sides; that increases the chance of losing the ring. Aim for a middle ground where the sizer passes your knuckle with firm resistance but doesn’t require brute force.
Practical test: slide the sizer on until it clears the knuckle, then let it settle on the base of the finger. If you can turn the finished loop around the finger with slight pressure using two fingers, the fit is usually correct. If the sizer spins freely or can be pulled off quickly with one hand, that’s a clear sign you measured too loosely.
Pay attention to circulation and comfort during the first few hours of wearing a newly sized ring; numbness, blue fingertips or pins-and-needles mean the ring is too tight and you should size up. Conversely, if a ring slides off when you wash your hands, sizing down might be necessary or consider a half-size for safety.
Band Width: Why It Matters More Than You Think
Narrow bands and wide bands do not feel the same at the same size. A 2–3 mm band sits a lot differently than a 8 mm or 10 mm band; wider bands cover more skin and restrict flex, so they feel tighter. Jewelers commonly advise increasing the size by about a half size for bands 6 mm wide, and by about one full size for bands 8 mm or wider to achieve equivalent comfort.
Account for the profile and inner fit as well: comfort-fit bands with a rounded inner surface will feel slightly roomier than flat interiors, and thicker metal can add perceived tightness. If you’re between sizes and plan a 7 mm or wider wedding band, err on the larger side or order a test ring in the intended width.
Practical example: if your daily ring is a 6.5 in a 2.5 mm band, choose a 7 or 7.5 for a 9 mm band. That one-size-up rule prevents digging and long-term skin irritation, and makes resizing later far less likely.
Foolproof Method #1: The Printable Ring Sizer Revolution
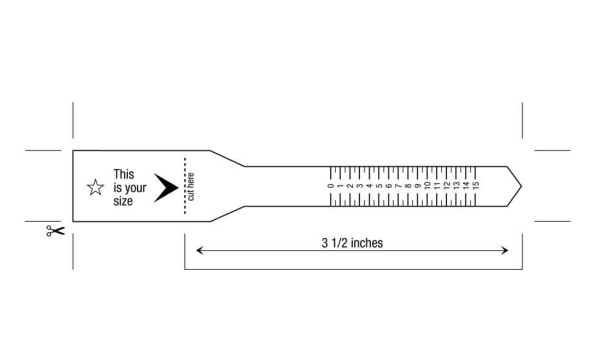
Printable ring sizers give you jeweler-grade accuracy without a trip to the store: many reputable jewelers publish PDFs that map inner diameters in millimeters to US and international sizes. For example, US size 6 typically measures about 16.5 mm inner diameter (≈51.8 mm circumference), while size 7 is about 17.3 mm inner diameter; having those labeled circles printed lets you match an existing ring or the finger directly. Use a crisp printer and a flat surface, and you can get within a tenth of a millimeter — accurate enough for buying most rings online.
Printable sizers also let you verify unusual sizes (half and quarter sizes are shown on many charts) and avoid guesswork with band widths: if you plan a wide band (6 mm or more), you can intentionally choose a half-size larger by comparing how the printed circles align against your finger to simulate the extra tightness. That simple preview often saves a return or an unexpected resizing fee.
Sourcing a Reliable Online Ring Sizer
Download PDFs from established jewelry retailers like Blue Nile, James Allen, or local independent jewelers that provide a downloadable “print-at-100%” ring sizing chart; these typically include both inner-diameter (mm) and corresponding US sizes so you can cross-check. Look for files that include a built-in scale box (1″ or 30 mm) and explicit printing instructions — those indicators separate a professionally made sizer from casual images on blogs.
Avoid using random images or screenshots found via image search, because browsers and mobile apps often rescale images. Choose sizers that state the measurement standard (ISO/ANSI or mm) and show concrete examples — for instance, a chart that lists size 8 as 18.2 mm inner diameter gives you a measurable target rather than a vague circle.
Ensuring Accurate Print Scale
Check the included scale box immediately after printing: a one-inch test square must measure exactly 1.00″ (25.4 mm) with a metal ruler or caliper. If that square comes out at 0.98″ or 1.02″, the entire template is off by 2% and the ring diameters will be off by roughly the same percentage — on a 16.5 mm circle that’s about ±0.33 mm, enough to push you across a half-size boundary in some cases.
Change your printer settings to “Actual Size” or 100% and disable “Fit to Page” or scaling options; choose “Portrait” or “Landscape” only as the PDF recommends and print on standard A4 or Letter paper (whichever the file targets). Some printer drivers add margins that shift the image; using the PDF viewer’s print preview to confirm the test square before printing again prevents wasted attempts and inaccurate measures.
For the best result, measure the printed test square with a digital caliper rather than a plastic ruler — calipers give precision to 0.01 mm so you can detect even a 0.5% error. If you still see variation, try a different printer or ask a local print shop to print the PDF at exact scale; shops often have professional printers that hold scale within 0.1%.
Using Existing Rings to Find Your Size
Measure the inner diameter of a ring that already fits the intended finger: lay the ring flat and use a digital caliper to measure straight across from inner edge to inner edge through the center point — that value in millimeters maps directly to size charts (for quick reference: size 5 ≈ 15.7 mm, 6 ≈ 16.5 mm, 7 ≈ 17.3 mm, 8 ≈ 18.2 mm, 9 ≈ 19.0 mm). Avoid measuring outer dimensions or the band thickness; inner diameter is the authoritative number jewelers use.
If you don’t have calipers, place the ring over the printed sizing circles and pick the circle that matches the inner edge exactly — the ring should sit flush without gaps or overlaps. Note whether the ring is a comfort-fit inside (rounded interior), since comfort-fit rings often measure slightly larger internally and can read as a larger size; in that case, check with the jeweler or favor a half-size down relative to the printed match.
Measure the same ring three times and average the results to reduce reading error, and only use a ring that currently fits the same finger you plan to wear the new ring on — sizes differ significantly between fingers and hands. If the band is wide (6 mm+), plan on choosing about a half-size larger than the measurement indicates to compensate for the extra contact area that makes wide bands feel tighter.
Foolproof Method #2: The String or Floss Technique
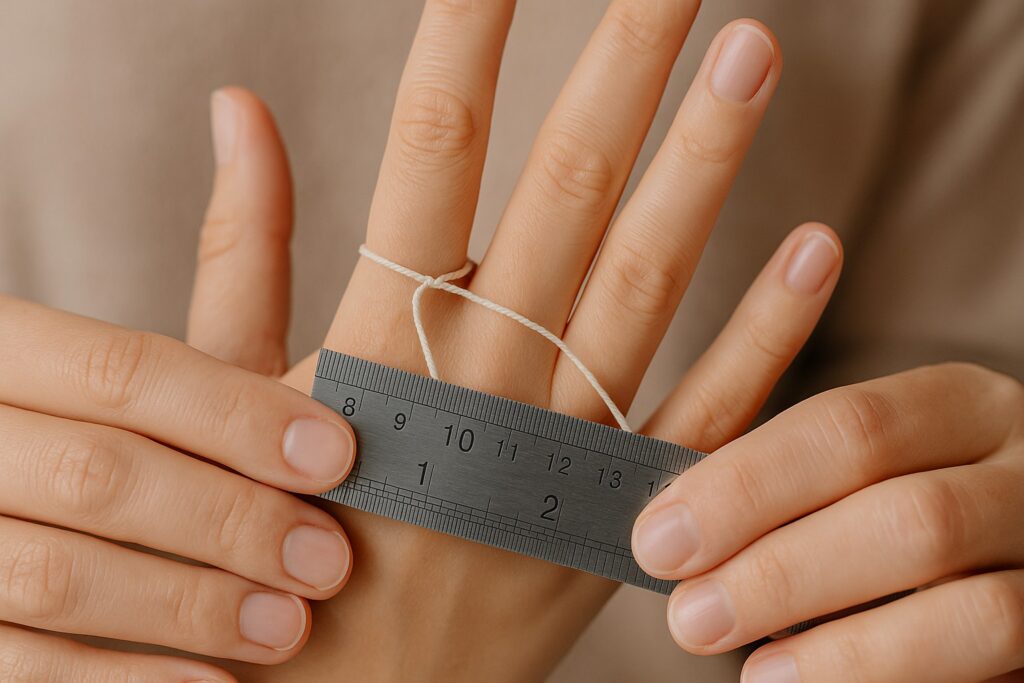
Wrap a single strand of non-stretch cotton string or dental floss snugly around the base of the finger you want to size, then mark the spot where the string overlaps with a fine-tip pen. Measuring that marked length against a millimeter ruler gives you the finger’s inner circumference; aim for accuracy to within 0.5 mm and repeat the process three times to confirm consistency. Many people get a reliable result by measuring at the end of the day, when fingers are at their largest — this reduces the chance of ordering a ring that ends up too tight.
String or floss works exceptionally well for odd or in-between sizes because you can measure circumference directly rather than rely on pre-cut ring sizers. Watch out for common mistakes: avoid thin elastic thread or stretchy yarn and don’t pull the string tight enough to compress the skin. If you plan a wide band (6 mm or wider), plan to add an extra 0.5–1.0 mm to your measured circumference for comfort.
Crafting Your Measuring Tool
Choose a piece of non-stretch cotton string, thin unwaxed dental floss, or a narrow strip of printer paper — materials that won’t stretch under tension. Keep the string length to about 15–20 cm so you can handle it easily; longer pieces can tangle and introduce measurement error. Avoid knitting yarn or elastic thread because they can stretch or compress, producing readings that are too small.
Use a fine-tip permanent marker to make a precise mark where the overlap meets, or tie a tiny, snug knot right at the overlap point. A clear millimeter ruler or digital caliper gives the most accurate readout; if you only have a standard ruler, measure against the millimeter scale and round to the nearest 0.5 mm. A digital caliper reduces uncertainty and is worth borrowing if you want a truly precise result.
Steps to Achieve Accurate Length Measurement
Start by wrapping the string snugly around the finger base and slide it back and forth to find the natural resting position — then mark the overlap. Pull the string only until it lies flush against the skin; excessive tension will underestimate circumference. Measure the marked length on a millimeter ruler to the nearest 0.5 mm, and perform three separate measurements (morning, afternoon, evening or three consecutive trials) to check consistency. If your three measurements are 51.5 mm, 52.0 mm, and 51.8 mm, average them to get 51.77 mm — use that averaged value for conversion.
Check the knuckle if the ring will need to slip over it: measure both the knuckle circumference and the base circumference. If the knuckle is 56 mm and the base is 54 mm, plan to choose a size that balances pass-over comfort with wear comfort — often the middle ground or the larger measurement. For wide bands over 6 mm, add about 0.5–1.0 mm to the base circumference before converting, since wider rings reduce lateral flexibility and feel tighter.
Take three readings and compare them: if the spread between smallest and largest is greater than 1.0 mm, re-measure later in the day or on another day. Averaging consistent readings reduces the chance of ordering the wrong size and gives you a dependable circumference value to convert.
Converting Measurements with Confidence
Convert your final circumference (in millimeters) to diameter using diameter = circumference ÷ π (use π ≈ 3.1416) when a chart requires diameter. Example: a 54.4 mm circumference ÷ 3.1416 = 17.32 mm diameter, which corresponds to about a US size 7. Many jewelry size charts also accept circumference directly — the European/ISO size equals the circumference in millimeters, so a 54 mm measurement is EU size 54.
When your measurement falls between standard sizes, choose the larger option for comfort; for instance, if your measured circumference is 52.6 mm, go up to the size closest to 53.0 mm. For very wide bands (over 6 mm), plan on selecting a size at least half a size larger or adding the extra 0.5–1.0 mm before conversion so the finished ring won’t feel too tight.
If you prefer a one-step check, paste your averaged circumference into a trusted online ring-size converter or compare it against a reputable jeweler’s chart. Converters handle the math and international mappings for you, but always round up slightly for a safer fit rather than rounding down.
Foolproof Method #3: The Paper Strip Approach
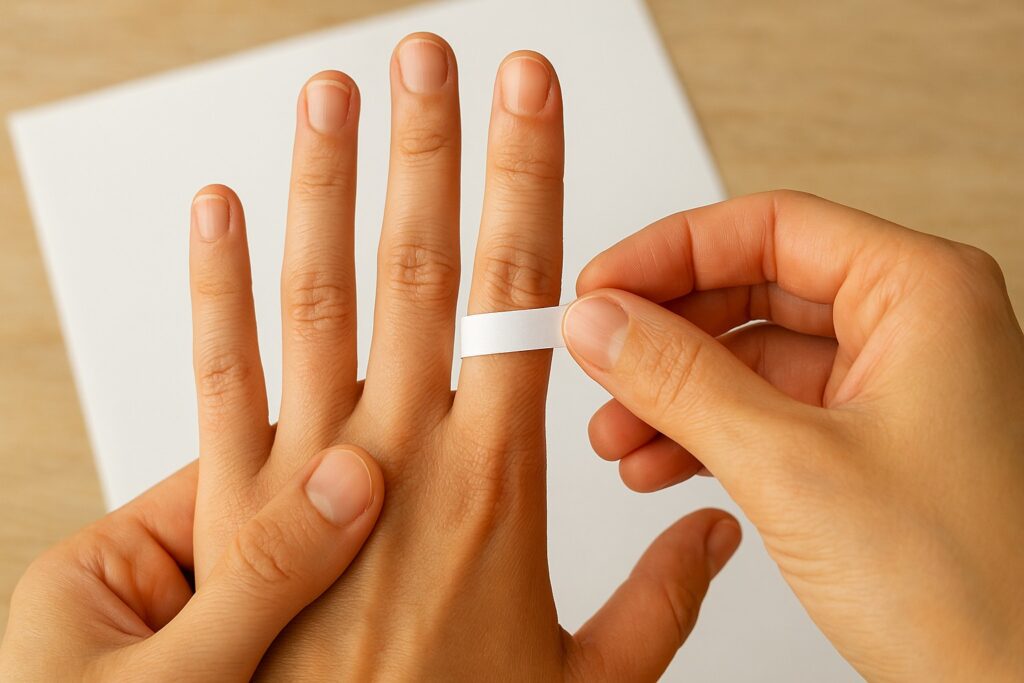
Paper strips give you a near-jeweler-level measurement without buying any tools: used correctly, you can reliably measure the inner circumference of your finger to within about ±0.5–1.0 mm. Choose a thin, flexible sheet (standard 80 gsm printer paper works well) so the strip lies flat against your skin; heavy cardstock or tape will falsely increase the reading. Cut a strip roughly 4 mm wide and 110 mm long — long enough to wrap around most adult fingers with a little overlap.
Wrap the strip at the base of your finger and mark the overlap point with a fine-tip pen; then use a metal ruler to measure the marked length in millimeters. A common reference: a circumference of 54.4 mm corresponds to about a US size 7, so converting millimeters to size charts after measuring makes ordering a ring easy. Take measurements at different times of day (fingers swell and shrink) and average them to reduce variability.
Creating Your Measurement Tool: A Step-by-Step Guide
Follow these concise steps to make a repeatable paper sizer; the table below breaks each action down so you can perform them in sequence and avoid common errors.
Paper Strip Sizing — Step-by-Step
| Step | What to do |
|---|---|
| 1. Select paper | Use standard printer paper (≈80 gsm). Avoid textured or glossy paper and steer clear of tape or thin fabric that stretches. |
| 2. Cut the strip | Cut a strip about 4 mm wide and 100–120 mm long. A clean, straight edge prevents measurement error. |
| 3. Wrap and mark | Wrap snugly—but not tight—around the finger base. Mark the point where the strip overlaps with a fine-tip pen. Do not pull the paper taut. |
| 4. Measure | Lay the strip flat and measure from the strip end to the mark with a metal ruler in millimeters. Record the number to the nearest mm. |
| 5. Repeat | Measure at least three times and use the average. If the knuckle is larger than the base, measure both and use the larger circumference for rings that must pass over the knuckle. |
| 6. Convert | Use a reputable ring size chart to convert circumference (mm) to your target sizing system (US, UK, EU). For example, 54.4 mm ≈ US 7. |
Keep a metal ruler and a fine-tip marker nearby so you avoid estimating by eye; even a 1–2 mm marking error can shift you by roughly a half-size. If your knuckle is notably bigger than the base, add an extra 1–2 mm to the base measurement or select the larger measurement to prevent the ring from getting stuck—this is a common adjustment many jewelers recommend.
Advantages and Limitations of Paper for Sizing
Paper gives you speed, affordability, and surprising accuracy: you can do this at home in under two minutes with materials most people already have. The method works well for most fingers because paper conforms to curves and lets you mark the exact overlap; when done carefully, many users find results within about ±0.5 mm of a professional sizer. That level of precision is often fine for plain bands and ready-to-wear styles.
Limitations include paper thickness, moisture absorption, and human error while marking. Paper can compress slightly or stretch if you use tape or pull too hard, producing errors up to 1 mm or more, which can translate to about a half-size difference in some sizing systems. Test using the same paper type and technique each time and average multiple readings to minimize this variability.
Additional tip: avoid measuring right after washing hands or in cold conditions—temperature affects finger girth—and if you expect a snug-fitting ring, verify the paper result against a printed-size chart or ask a jeweler to confirm before placing an order.
Final Words
The straightforward methods outlined — using a printed chart, a paper or string loop, a plastic or metal sizer, or a jeweler’s mandrel — let you get an accurate ring measurement at home when you follow a few practical rules: take measurements at the end of the day when your fingers are at a normal size, measure several times and in millimeters, account for knuckle width if it’s larger than the base of your finger, and add a slightly larger size for wider bands. By checking your result against a reputable sizing chart and measuring under consistent conditions (temperature, hydration, hand activity), you’ll reduce variability and increase confidence in the number you record.
When you’re unsure, verify your measurement with a jeweler or choose rings that can be resized; keeping a written record of your measured diameter or circumference makes future purchases easier. With careful measuring and these practical checks, you can trust your at-home size and pick rings that fit comfortably for everyday wear.